Tuesday, 25 December 2012

Merry Christmas

A Merry Christmas wish to you and yours from our hideyhole on the North coast of Kent.
The weather is foul outside, but the house is warm and cosy...it is a very relaxing break.
A detail from our tree - a happy face
T x
 

Thursday, 13 December 2012

Happy Birthday

It's Ella's 10th birthday this Saturday, but as school finished already on Wednesday, we made some cupcakes to take in for her friends and teachers - the design is melting snowmen!  I thought these turned out adorable - not perfect, as they look more like seagulls, but I almost felt like naming them - they were all so individual!

Happy holidays to all!

Wednesday, 12 December 2012

We love a little bit of jewellery making as well...

The head mistress at my daughter's school is the lucky recipeint of this gorgeous hair comb - she is new, so we don't quite know her tastes yet, hence no pouch. Maybe at the end of the school year...
Wide wire hair comb modelled by my daughter.

Tuesday, 11 December 2012

Home made birthday present

My daughter and I always try to come up with a personal home made present for her friends' birthdays.  This weekend was Naomi's 10th birthday and she got this personalised pencil roll.


Monday, 10 December 2012

Xmas presents

I have been rather quiet (read busy) lately due to the sudden (!) and numerous Christmas presents required for school teachers and colleagues etc. So, here is a gallery of a few I made - all very personal.


Libery tana lawn zipper patchwork pouch
Liberty pouch for a work colleague (love love love how this turned out!)
Detail of the zip pull - a wool felt ball, a Jade ring and a Swarovski crystal.

The lining.

* * *
And this pouch is for the head of academic studies at my daughter's school.

 The new Windham school house fabric range has lovely letter panels
 which made this an easy project to personalise.  

Detail of the zip pull. 
The red London map fabric has the school location in it.

This is the back with a piece of school uniform in the bottom corner!
* * *
Pouches have been popular presents in the past - so, I am on a roll!
This one is for the science teacher who is leaving for a gap year, which she is planning to sepnd travelling. The sceleton in her lab is decorated with a feather hat, scarf and a handbag...
The front with the happy scellies.
 
The back - Bon Voyage and see you next year!
  
The lining - just like on a ship sailing away.

Detail of the zip pull - makes a simple pouch quite special.

* * *
And last, but not least, this is an A4 size document pouch for the form teacher who is also head of maths at my daughter's school.
Stamped name and lots of number fabrics for the maths teacher.
I had to gather lots of number and London fabrics for this...


More chevrons and text fabric

I got so hooked on these chevrons that I decided to make a quilt.  Although this is not an easy pattern to work with in larger designs. As you can see, it's impossible to break the design into blocks!  The quilt sections have to be worked in coloums, which means it's "stitch a row and get up and press it" - sit down, get up, sit down and get up again countless times...so, to reduce the up and downs I worked on three columns at the same time.  I am liking the look alot and ideally I would need a fourth column, but it remains to be seen whether it will get done.  The fabrics are various text prints and Moda's Mod Centruy collection.


Saturday, 10 November 2012

Chevrons

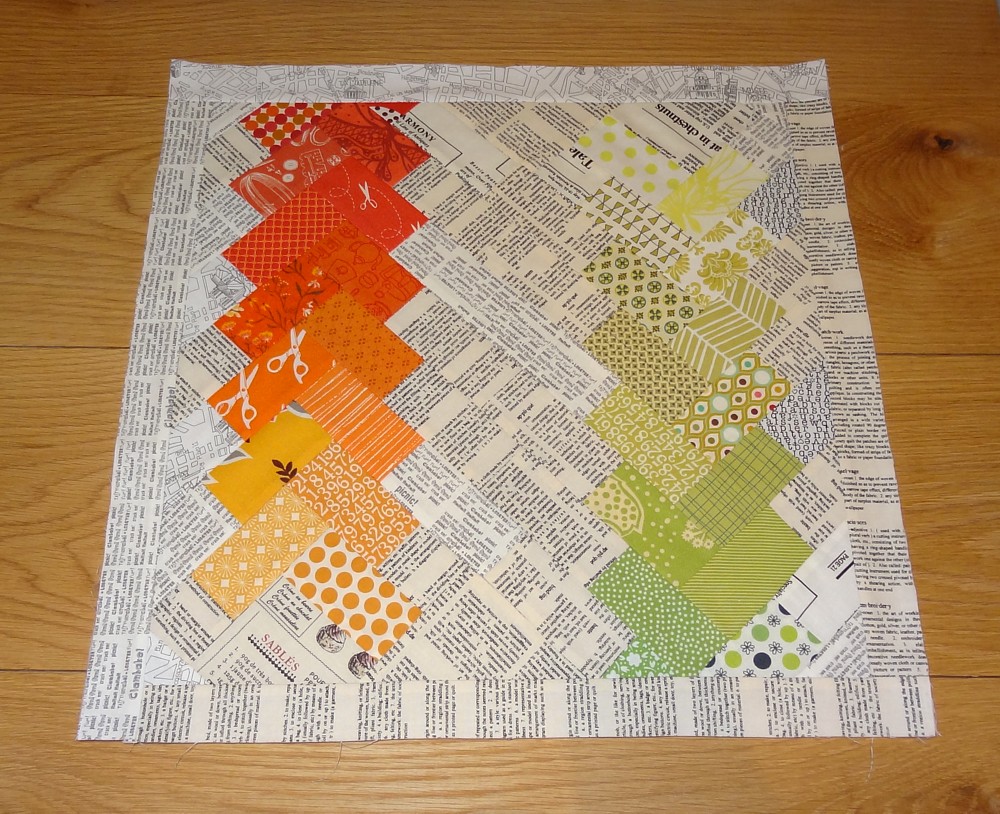
I made a chevron cushion panel as a trial a few weeks ago and totally fell in love with it.
But, what I really wanted to make was a chevron quilt and today I finally made a start.
The new Mod Century fabrics were waiting to be used, so luckily the plan was already in place. 
Mod Centry designs remind me of what turned out to be our very Scandi cool kitchen when I was growing up.
And text fabrics were an easy choice for the background, as they worked so well in the cushion.
T x


Wednesday, 7 November 2012

EPP & hexagons

Do you love hexagons and English Paper Piecing (EPP)?
 
I sure do and above that I love hand stitching. But, I am not fond of the preparation e.g cutting loads of papers very accurately, basting the fabric around the papers, then removing the said papers etc.etc. Hence, I decided to try a glue method for English paperless piecing.
Glad to report that it worked very well! I used it succesfully in this cushion project!
 
 Here's a quick tutorial on the paperless method:
In addition to your fabric, all you need is one paper template of each chosen shape in the finished size (this project had several shapes, but it could be just one hexie), an air erasable disappearing marker or a pencil and a Sewline fabric glue stick!
 
Take a fabric and put the paper template on the right side.
With the disappearing marker, draw the paper outline on the right side of the fabric. 
Cut the fabric adding your desired seam allowance (I used the usual 1/4", but it's not really so exact. As long as the s.a. is there-abouts it's fine).
 
Turn over to the wrong side and apply fabric glue to the edges.

Turn over to the right side and fold over the seam allowances exactly along the marked lines and finger press down to stick.
 
 
  Repeat with all the shapes and you are ready to stitch!
Stitch with a whip stitch close to the edge with right sides together.
As you can see in the picture, I use batting/wadding to lay out the prepared fabric shapes, so that I can easily move it if necessary and the fabric pieces stay well in place as well.
Please note: Leave any outer edges unfolded, as these are the seam allowances of the finished top – the seam allowance is needed when the top is stitched to the border or to a backing.

The pattern for this actual cushion can be bought at Tikki.

Monday, 5 November 2012

Quilters Grid by Vielene

Vilene/Pellon Quilter's Grid,  1 inch Grid, 44 inches wide.  A nonwoven fusible with 1 inch printed grid for precision piecing of quilting projects. 
After I posted the aqua scrap cushion project, I had quite a few questions about Quilters Grid.  I always keep some of it in my stash.  It's a fusible fine vilene stabilizer with an one inch square grid printed onto it.  It's great for patchwork projects where you want a little bit more stabilizing support like bags, cushions and such projects. The finished patchwork is in my humble opinion very hard work to hand quilt, hence I would only plan a machine quilting project if I intend to use it.  But it is fabulous in accuracy and speed!  In the UK you can get it here!

 
This is what the grid looks like.
 
TUTORIAL:
Cut the fabrics to the same size "full" squares, by which I mean that they can't be halves like 2.5". 
They must be 1", 2", 3" or larger and they must all be the same size.
In this example we cut 2" squares and the grid was 24" by 24" = finished size 18" square cushion.
(=as all those 2" squares finish at 1.5" each times 12  is 18", so we need 12 x 2 " = 24"square grid)
Note: Ideally the squares should be just (like an 1/8" or 1/16") under the required size, so that the fabrics don't overlap the grid.

Lay the grid with the fusible side up on a light background which could be a towel or an old tablecloth.  You also need to be working on a surface you can iron on.  I used a foot stool as I was watching a movie at the same time - multi tasking....
Lay the squares in a pleasing order and press them down with a hot iron (mine was on the hottest setting).
 
Stitch all horizontal seams with a 1/4" seam allowance. Press the seams to one side or cut them open and press the seams open as I did. Remember to reduce the heat when pressing on the vilene, so that it doesn't scorch.

Stitch all vertical seams with a 1/4" seam allowance. Press as before. Congratularions - it's ready!

It's was easy and quick - the only hassle is pressing those seam allowances open, but once that's done, the result is really amazing.
Here is the wrong side
 
Check out those matching corners - they happened by magic!

Good luck with your Quilters Grid ventures.
Tx

Sunday, 4 November 2012

Summer stamp quilt


This post comes a little late, but I wanted to share a quilt I made for my 9 year old daughter this summer when she went to a residential camp. This was great fun making and most of the blocks have some special messages stamped onto them.  My daughter would only use a quilt if it has fleece on the back - shock horror!  But I must agree with her that they sure are very cuddly and cozy.


This was the first time I made a scrappy binding although I have been quilting since the 90's!  I love it in this project - it turned out just like I wanted it!

Saturday, 3 November 2012

I love scraps!

My dear Flickr friend Mel from the States sent me these lovely fabric scraps in mostly aqua colours - left overs from her seriously large stash!
Scraps for me!
 I love them and especially so the ones in the foreground, so I couldn't wait to start a project...why is that someone else's scraps always look better than your own?
Thank you Mel.

I wanted a really scrappy look for this project, so had a quick rummage through my own scraps and found the necessary missing pieces. The Accuquilt Go cutter had to be dusted down, but soon she was ready and using the 6 x 2" die I soon  had 144 yummy squares. Looking at the pile made me quickly decide to use a sheet of Vilene Quilters Grid to make the job easier and not to mention faster.
  I love scraps!
Here they are all 144 sqs ironed onto the grid.
I love scrappy pieced  I love scrappy pieced - detail
And finally pieced, 18" sq.                           (Can't get this pic to re-size!!!)
 

Thursday, 2 August 2012

Seeing everything in quilt patterns!

Too bad I havent' managed to blog as often as I had hoped - useless writer as you can see.  But I have been sewing more than ever instead...

After years of daily seeing this hall window in my house, I had an epiphany!  It suddlenly looked like a quilt pattern!  How could I have walked past it hundreds if not thousands of times having paid no attention to that octagonal graphic beauty.  Now it looks awesome - it is original from when my the house was built anno 1888.